Page 5 of 5: Using TMPGEnc DVD Author (TDA) - How to Create/Author a DVD
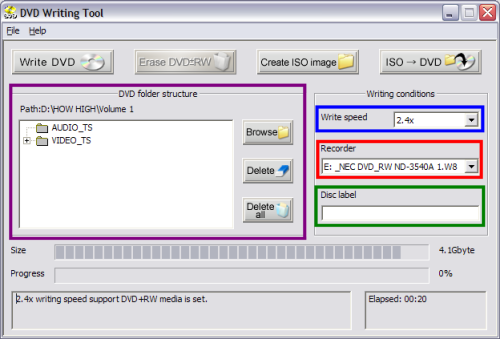
If you chose "Open DVD Writing Tool" then this screen would come up. Here you would tell TDA which drive to burn to (red), at what speed to burn it at (blue), the disc label (name) you want it to have (green), what files you want it to burn (pick them via the "Browse" button) (purple).
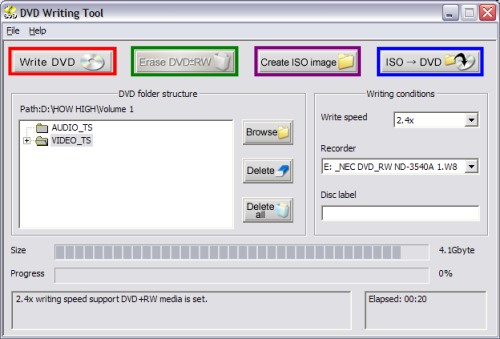
There are also 4 different buttons at the top. Each ones serves a different purpose. The first and last button basically do the same thing, burn the DVD. Only difference is the first one burns "Files" (VIDEO_TS Folder) (red) and the other burns "ISO" images (blue). The other 2 buttons are pretty self explanatory, one erases RW disc's (green) the other creates a "ISO" image (purple) of the "VIDEO_TS" folder.
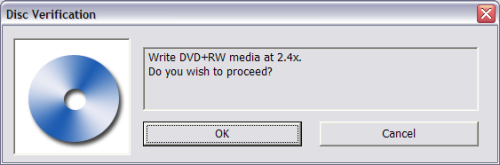
After pressing 1 of the 2 burn icons, this screen will pop up and let you know what kind of media you are burning to and what speed you want to burn it at. If the settings are correct, click OK. If they are not, click Cancel and go back and fix them. (Screen Shot Below)
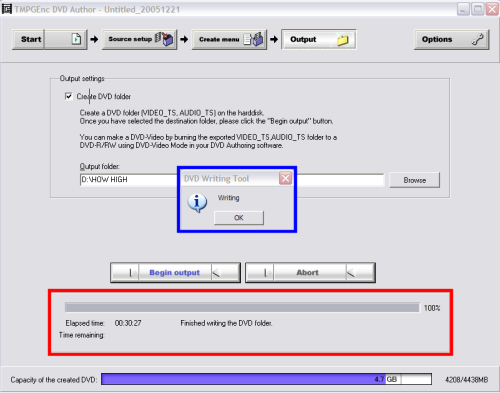
After clicking OK, just wait for it to finish! DONE! (Screen Shot Below)
There are also 4 different buttons at the top. Each ones serves a different purpose. The first and last button basically do the same thing, burn the DVD. Only difference is the first one burns "Files" (VIDEO_TS Folder) (red) and the other burns "ISO" images (blue). The other 2 buttons are pretty self explanatory, one erases RW disc's (green) the other creates a "ISO" image (purple) of the "VIDEO_TS" folder.
After pressing 1 of the 2 burn icons, this screen will pop up and let you know what kind of media you are burning to and what speed you want to burn it at. If the settings are correct, click OK. If they are not, click Cancel and go back and fix them. (Screen Shot Below)
After clicking OK, just wait for it to finish! DONE! (Screen Shot Below)
