Page 3 of 5: Using Nero Burning ROM 6.x - Burning a DVD
7. After configuring the tabs, click the "New" button in the upper right hand side of the "New Compilation" window. (Screen Shot Below)

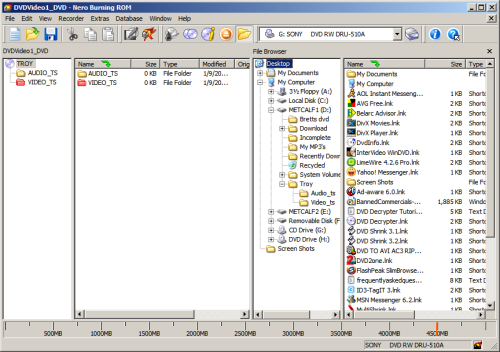
8. After clicking the "New" button, your screen should look like this: (Screen Shot Below)
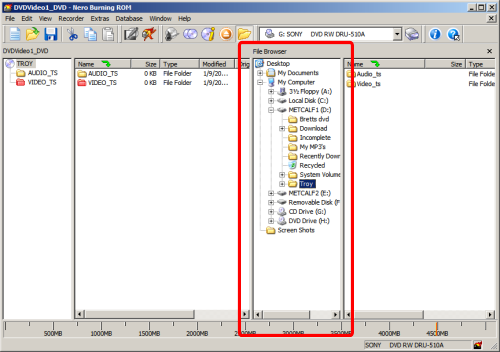
9. Now, you will want to navigate to your DVD file/s. To do that, in the "File Browser" sub window in the Nero window, click the appropriate folder containing your files. (I am doing the movie Troy, so I will go to the folder DVD Shrink created named "Troy".) (Screen Shot Below)
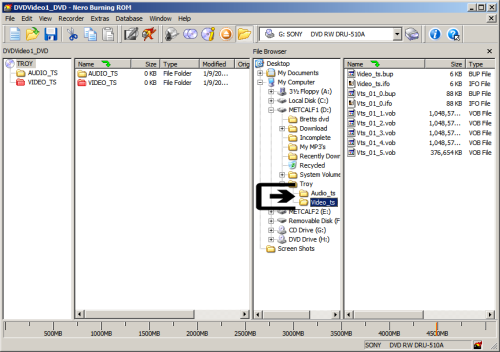
10. Once you find the correct folder, double click it while in the "File Browser" sub window, then it should reveal 2 sub folders by the names of "Audio_ts" and "Video_ts" or whatever folder you put your files in. (Screen Shot Below)
8. After clicking the "New" button, your screen should look like this: (Screen Shot Below)
9. Now, you will want to navigate to your DVD file/s. To do that, in the "File Browser" sub window in the Nero window, click the appropriate folder containing your files. (I am doing the movie Troy, so I will go to the folder DVD Shrink created named "Troy".) (Screen Shot Below)
10. Once you find the correct folder, double click it while in the "File Browser" sub window, then it should reveal 2 sub folders by the names of "Audio_ts" and "Video_ts" or whatever folder you put your files in. (Screen Shot Below)
