Page 4 of 5: Using TMPGEnc DVD Author (TDA) - How to Create/Author a DVD
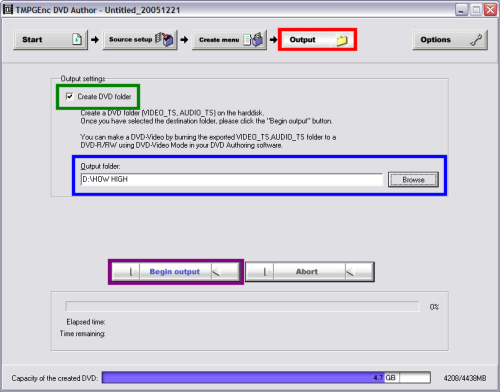
After you have fine tuned the Menu the way you like it, go ahead and click the "Output" button (red) at the top. On this screen you can set the output directory (where you want the file to be saved at) (blue). You can also tell TDA to create a "VIDEO_TS" folder and put all the files in it so that it will be more DVD compliant, although some programs like Nero already make a "VIDEO_TS" folder for you (green). When you are ready, click the "Begin Output" (purple) (Screen Shot Below)
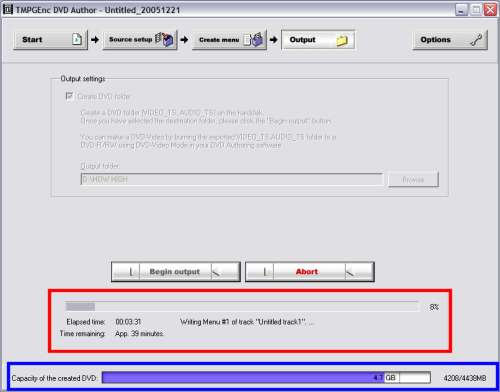
After you click the "Begin Output" button, TDA will now start to convert the MPEG-2 file to compliant DVD structure (.BUP, .IFO, .VOB files) and give you the "estimated" time of completion, as well as the "Elapsed Time (how long its taken so far)" (red). At the bottom it gives you the final overall size of the DVD. As long as you do not go past the 4.7GB standard line, you will be able to burn right after it finishes. If it is past the 4.7GB standard line, don't worry! Just use DVD Shrink or similar, to compress the video size down (blue).
When TDA completes, this screen will pop up. You have two options (1 option if your OS is not Windows 2000 or XP).
After you click the "Begin Output" button, TDA will now start to convert the MPEG-2 file to compliant DVD structure (.BUP, .IFO, .VOB files) and give you the "estimated" time of completion, as well as the "Elapsed Time (how long its taken so far)" (red). At the bottom it gives you the final overall size of the DVD. As long as you do not go past the 4.7GB standard line, you will be able to burn right after it finishes. If it is past the 4.7GB standard line, don't worry! Just use DVD Shrink or similar, to compress the video size down (blue).
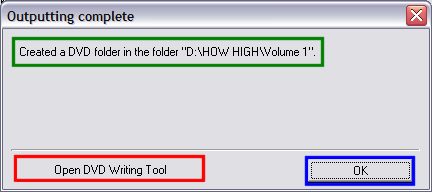
When TDA completes, this screen will pop up. You have two options (1 option if your OS is not Windows 2000 or XP).
- Open DVD Writing Tool - TDA will burn it for your through its own personal burn engine. This option is only for Windows 2000/XP users. (red)
- OK - The files will reside on the hard drive in the folder you specified and wait for you to burn them with your favorte DVD burning application, such as Nero (blue). It will also tell you where the files are saved at on your hard drive, in case you forgot (green).
